
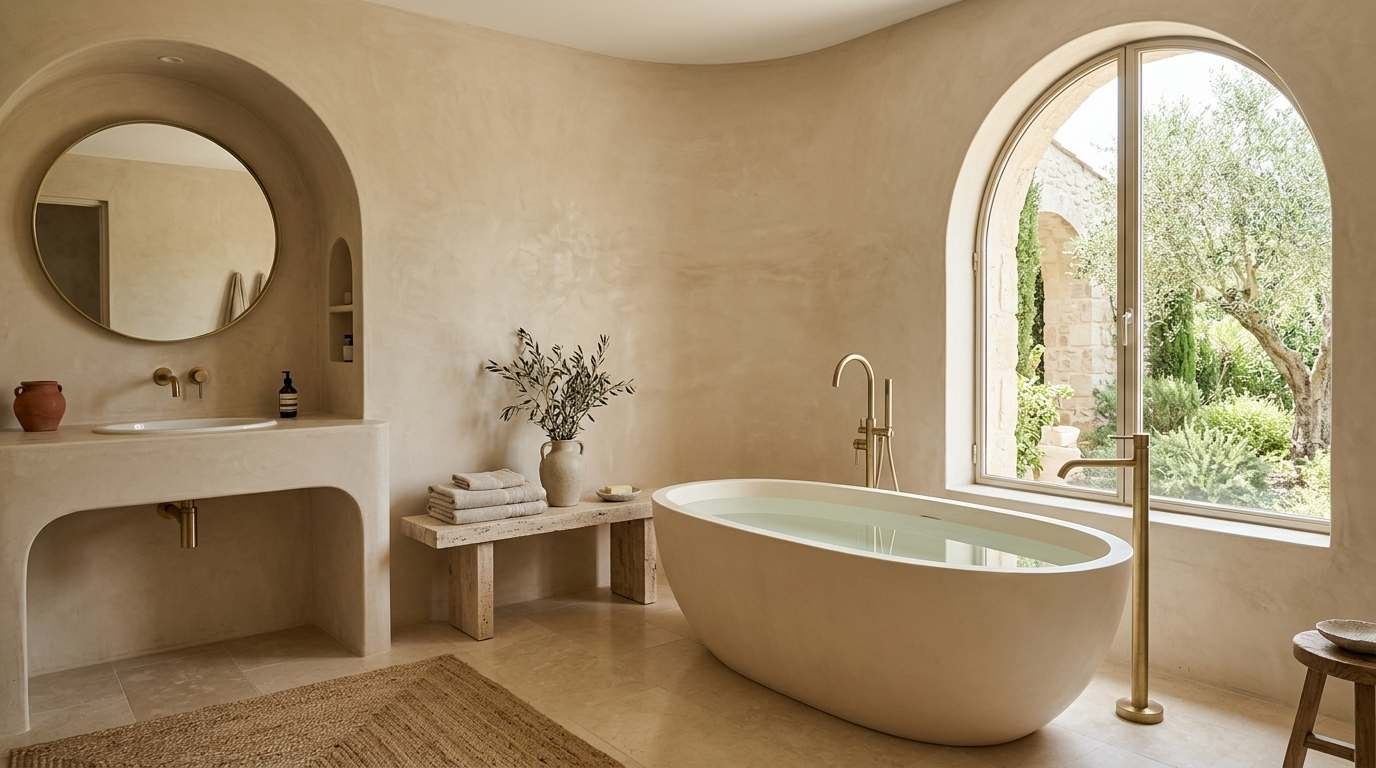

A tadelakt bathroom combines the warmth of traditional Moroccan plaster with a smooth, almost stone-like surface that works beautifully in modern, minimalist, rustic, Mediterranean, and luxury interiors. With its subtle movement, soft sheen, and seamless appearance, tadelakt can transform ordinary bathroom walls, shower areas, niches, and even countertops into a distinctive architectural feature.
A successful tadelakt bathroom DIY project requires more than simply spreading plaster across a wall. The surface must be prepared correctly, the material needs to be applied in thin layers, and the finish must be compressed and polished at the right stage. Waterproofing, curing, and ongoing maintenance are equally important, particularly in wet areas.
In this guide, we will cover the essential steps for creating a tadelakt-style bathroom finish, from surface preparation and material selection to application, polishing, sealing, and maintenance.
Table of Contents
What Is Tadelakt?
Tadelakt is a traditional Moroccan lime-based plaster known for its smooth, water-resistant finish. Unlike conventional painted drywall or ceramic tile, it creates a continuous surface without visible grout lines.
The characteristic appearance comes from carefully compressing the plaster with a smooth stone during application. This process closes the surface and produces the soft, slightly polished appearance associated with authentic Moroccan interiors.
Tadelakt is especially appealing in bathrooms because its seamless finish can reduce the visual clutter created by numerous tile joints. The result is a calm, spa-like environment with an organic handcrafted quality.
However, tadelakt should not be treated as ordinary decorative plaster. Proper preparation, application, polishing, and protection are essential for bathroom use.
Is Tadelakt Suitable for a Bathroom?
Yes, tadelakt is particularly well suited to bathrooms, including walls around sinks, baths, and showers, when the correct system is used.
Its water-resistant characteristics make it attractive for wet rooms, but water resistance is not the same as assuming that any lime plaster will automatically provide complete waterproofing.
For a bathroom renovation, we should distinguish between:
- Water-resistant decorative plaster
- A properly waterproofed bathroom substrate
- A correctly applied tadelakt finish
The waterproofing system behind the finish remains important. In a shower, for example, the underlying wall construction should be suitable for continuous moisture exposure before the tadelakt is installed.
Tadelakt Bathroom Materials and Tools
Before beginning a DIY project, we should gather everything required rather than stopping halfway through the application.
Typical materials and tools include:
- Tadelakt plaster or a specialist tadelakt mineral plaster system
- Appropriate primer or bonding coat
- Suitable waterproofing system for wet areas
- Clean water
- Mixing bucket
- Drill with mixing paddle
- Stainless steel trowel
- Smaller finishing trowel
- Spray bottle
- Smooth polishing stone
- Clean sponges
- Soft cloths
- Natural soap or manufacturer-approved soap treatment
- Protective gloves
- Dust mask and eye protection
- Drop cloths and masking materials
The exact tools and products will depend on the manufacturer’s system. We should always follow the application instructions supplied with the particular tadelakt product, because different formulations can have different curing times and finishing requirements.
Step 1: Prepare the Bathroom Surface
Surface preparation is one of the most important parts of a tadelakt bathroom DIY guide.
The wall must be stable, clean, dry, and appropriately prepared for the plaster system. Loose paint, dust, grease, wallpaper residue, and unstable material should be removed.
Uneven surfaces should be corrected before the tadelakt is applied. Tadelakt is not designed to hide major structural imperfections.
In shower areas, the substrate and waterproofing system require particular attention. Corners, joints, penetrations, plumbing areas, and transitions between materials should be properly treated before the decorative finish is installed.
A beautifully polished tadelakt surface cannot compensate for an improperly prepared substrate.
Step 2: Protect Fixtures and Surrounding Areas
Tadelakt application can become messy, particularly during mixing, troweling, polishing, and washing.
We should protect:
- Bathtubs
- Sinks
- Toilets
- Faucets
- Floors
- Mirrors
- Cabinets
- Electrical fittings
- Door frames
Masking edges carefully also makes it easier to achieve clean transitions.
If the bathroom is being renovated completely, applying the finish before installing delicate fixtures can make the process considerably easier.
Step 3: Apply the Base Coat
The base layer provides the foundation for the final finish.
Depending on the tadelakt system, a suitable mineral or textured base coat may be required to create the correct surface for the plaster to adhere to.
The base should be applied consistently and allowed to reach the appropriate stage before the tadelakt layer is installed.
Do not rush this stage. Moisture, temperature, substrate condition, and product specifications can all affect drying and curing.
Step 4: Mix the Tadelakt Carefully
Mixing should be performed according to the manufacturer’s instructions.
Add the required amount of water gradually rather than flooding the dry material with excessive water. A consistent mixture helps create predictable coverage and makes finishing easier.
The goal is a workable plaster that spreads smoothly without being excessively wet.
We should mix only an amount that can realistically be applied within the product’s working time. Once the material begins changing consistency, attempting to rework it unnecessarily can affect the final surface.
Step 5: Apply the First Tadelakt Layer
Apply the tadelakt in a thin, even layer using the recommended trowel.
Avoid trying to create excessive thickness in a single application. The objective is controlled coverage rather than building the entire finish immediately.
Work systematically across the wall, maintaining a wet edge where possible.
Small imperfections can often be addressed during later finishing stages, but excessive manipulation can create unwanted variations in texture.
Step 6: Apply and Compress the Finish
Once the plaster reaches the correct working stage, the surface can be compressed using the appropriate tool.
This is where the characteristic tadelakt finish begins to develop.
The surface is gently worked and compressed rather than aggressively rubbed. Pressure should be controlled and consistent.
The polishing stone is particularly important because it helps close the surface and creates the smooth, slightly luminous appearance associated with traditional tadelakt.
Different pressures and movements can produce subtle variations, which are part of the appeal of handcrafted lime plaster.
Step 7: Polish the Tadelakt Surface
Polishing is one of the defining stages of a tadelakt bathroom project.
Using a smooth stone, we can gradually compress the surface as the material reaches the appropriate stage of firmness.
The objective is not to create a perfectly uniform manufactured appearance. Authentic-looking tadelakt typically contains gentle tonal variations, soft movement, and small differences in texture.
Avoid over-polishing one area while neglecting another. Excessive localized pressure can create visible differences in sheen.
For a large bathroom, working methodically in manageable sections can help maintain consistency.
Step 8: Create Clean Corners and Transitions
Tadelakt works particularly well around architectural features such as:
- Shower niches
- Curved walls
- Vanity areas
- Arched openings
- Bathtub surrounds
- Built-in shelving
Corners require patience because they can become visually prominent.
Rather than creating harsh tile-like lines, tadelakt can produce softer transitions. However, movement joints and structural transitions should not simply be covered and ignored. The underlying construction must accommodate movement appropriately.
Step 9: Apply the Soap Treatment
Traditional tadelakt often receives a soap treatment that contributes to its water-resistant properties and characteristic finish.
The timing and application method are important. The soap should be applied according to the specific tadelakt manufacturer’s instructions.
Applying too much product can leave an undesirable surface, while insufficient treatment may not provide the intended protection.
A natural soap treatment can also subtly deepen the color and enhance the soft sheen of the finished plaster.
Step 10: Allow the Surface to Cure Properly
One of the easiest mistakes in a DIY tadelakt bathroom is using the finished surface too soon.
Even when the plaster feels dry to the touch, the material may still be curing.
Allow the surface to cure for the period specified by the product manufacturer before exposing it to heavy moisture or regular shower use.
During this period, we should avoid scrubbing, soaking, or placing unnecessary stress on the surface.
Tadelakt Shower Walls: What We Should Know
A tadelakt shower can create an exceptionally beautiful seamless appearance, but it requires careful planning.
The tadelakt itself should not be considered the sole waterproofing system unless the complete manufacturer’s system specifically states that it functions that way.
For a shower installation, we should pay particular attention to:
Waterproof substrate: The wall assembly should be appropriately waterproofed.
Corners: Changes in plane need proper detailing.
Pipe penetrations: Plumbing penetrations must be adequately sealed.
Drainage: Water should drain efficiently rather than remain against the plaster.
Maintenance: Regular care helps preserve the finish.
For high-moisture installations, professional installation can be worthwhile, particularly if we have little experience with plaster or bathroom waterproofing.
Best Tadelakt Colors for a Bathroom
One of the advantages of tadelakt is its ability to create subtle color rather than the flat appearance of standard paint.
Popular choices include:
- Warm white
- Cream
- Soft beige
- Sand
- Taupe
- Greige
- Terracotta
- Clay
- Warm gray
- Olive-inspired neutrals
- Soft blush
- Charcoal
For a luxury tadelakt bathroom, warm neutrals work especially well with natural stone, brushed brass, aged bronze, oak, walnut, and handmade ceramics.
A monochromatic palette can also emphasize the seamless architecture of the plaster.
How to Style a Tadelakt Bathroom
Tadelakt pairs naturally with materials that have organic textures.
For a modern Moroccan look, we can combine warm plaster with sculptural mirrors, handmade ceramics, woven baskets, and aged metal fixtures.
For a minimalist bathroom decor, the strongest approach may be to keep the palette restrained and allow the plaster itself to become the main design feature.
For a Mediterranean-inspired space, tadelakt can be paired with natural wood, limestone, travertine, linen, and warm terracotta.
For quiet luxury, we can introduce understated stone, elegant brass fixtures, soft lighting, and high-quality natural textiles.
The key is to avoid overwhelming the organic finish with too many competing decorative materials.
Common Tadelakt DIY Mistakes to Avoid
Applying Tadelakt to an Unsuitable Surface
Poor adhesion can cause cracking, delamination, or premature deterioration.
Skipping Proper Waterproofing
Decorative plaster should not be used as an excuse to ignore bathroom waterproofing requirements.
Applying the Material Too Thickly
Excessive thickness can make the material harder to control and may affect curing.
Overworking the Surface
Too much troweling or polishing can create inconsistent texture and unwanted marks.
Using the Shower Too Soon
The finish needs adequate time to cure and develop its intended properties.
Using Harsh Cleaning Products
Aggressive chemicals and abrasive cleaners can damage the finish.
Expecting a Perfectly Uniform Surface
Tadelakt is a handcrafted material. Subtle variation is part of its visual character.
How to Clean a Tadelakt Bathroom
Regular cleaning should be gentle.
Use a soft cloth or non-abrasive sponge with a mild, compatible cleaning solution. Avoid harsh acidic cleaners, abrasive powders, aggressive scouring pads, and products that may degrade the surface treatment.
After showering, wiping excess water from high-use areas can also help maintain the finish.
If the surface begins looking dull or shows signs of wear, follow the maintenance recommendations for the specific tadelakt system rather than applying an unrelated sealant or coating.
How Long Does Tadelakt Last in a Bathroom?
A properly installed and maintained tadelakt surface can remain attractive for many years.
Its longevity depends on several factors, including:
- Quality of the substrate
- Waterproofing
- Application technique
- Product quality
- Curing conditions
- Water exposure
- Cleaning habits
- Maintenance
- Movement in the underlying structure
A well-maintained bathroom can therefore benefit from tadelakt for a long time, while poor preparation can cause problems much sooner.
Can We Apply Tadelakt Over Existing Tiles?
It may be possible with some specialist systems, but we should never assume that tadelakt can simply be spread over any existing tile surface.
The tiles must be stable, thoroughly cleaned, appropriately prepared, and compatible with the chosen plaster system. Grout lines and surface irregularities may also need to be addressed.
Always check the manufacturer’s substrate requirements before attempting to cover existing tiles.
Tadelakt vs. Bathroom Tiles
Tadelakt and tile create very different visual and practical experiences.
Tadelakt provides a continuous, handcrafted surface with minimal visible joints. It is particularly attractive for curved architecture and minimalist bathrooms.
Tile provides a wide variety of patterns, textures, colors, and standardized installation options. Individual tiles can also be replaced more easily when damaged.
Tadelakt is therefore best suited to homeowners who appreciate organic variation, seamless surfaces, and handcrafted finishes.
Final Thoughts on a DIY Tadelakt Bathroom
A tadelakt bathroom DIY project can create one of the most distinctive finishes available for a home bathroom. Its seamless appearance, subtle texture, and soft mineral character can make even a compact bathroom feel calm, architectural, and luxurious.
The most important principle is to treat tadelakt as a complete finishing system rather than simply a decorative plaster. Surface preparation, bathroom waterproofing, controlled application, compression, polishing, soap treatment, curing, and gentle maintenance all contribute to the final result.
For a small decorative wall or vanity area, tadelakt can be an approachable DIY project for an experienced decorator. For a fully waterproof shower enclosure, however, careful substrate preparation and waterproofing are essential, and professional assistance may be the better choice when there is any uncertainty.
When installed correctly, tadelakt brings together functionality and craftsmanship in a way few conventional bathroom finishes can match. The result is a warm, seamless surface that feels timeless rather than trend-driven—and that makes it especially compelling for modern Moroccan, Mediterranean, minimalist, spa-inspired, and luxury bathroom design.




Leave a Reply