
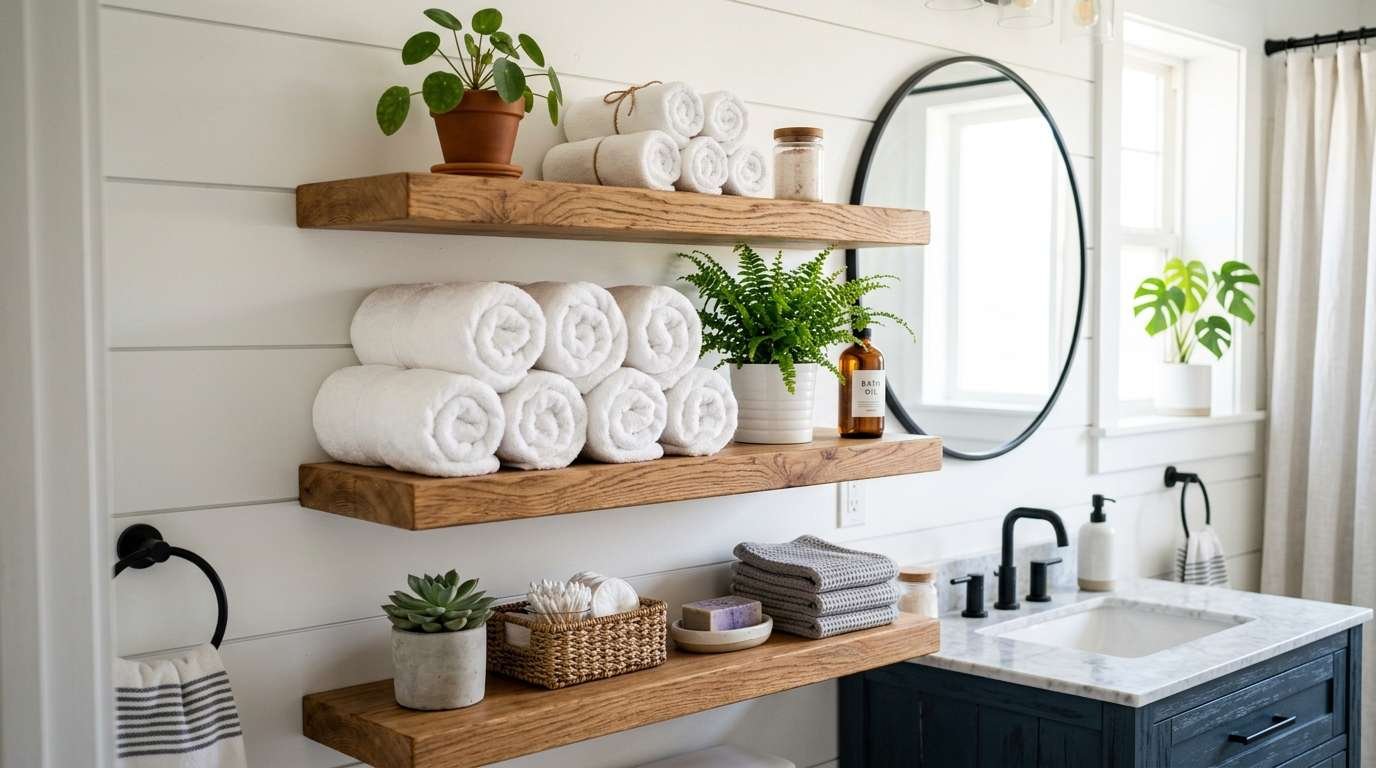

You can transform a cramped, cluttered bathroom into something that actually feels designed in a single afternoon. I’ve installed floating shelves in half a dozen bathrooms over the years, and the payoff always surprises people. You gain storage, you lose the visual weight of a cabinet, and you spend maybe $60 to $90 if you pick your materials right. This guide walks you through exactly how to do it yourself, from picking brackets to styling the finished shelves so they look like they came out of a magazine spread.
Quick Overview: What This Project Involves
Table
| Task | Time Required | Skill Level | Approx. Cost |
|---|---|---|---|
| Planning and measuring | 20–30 minutes | Beginner | $0 |
| Buying materials | 30 minutes (online or store) | Beginner | $40–$80 |
| Installation | 1–2 hours | Beginner to Intermediate | $0 |
| Styling and finishing | 30 minutes | Beginner | $10–$20 |
| Total Project | 2.5–4 hours | Beginner-friendly | $50–$100 |
Why Floating Shelves Work So Well in Bathrooms
Floating shelves attach directly to wall studs with hidden brackets, which removes the need for legs or visible supports. In a bathroom, this means you get storage without sacrificing floor space or making the room feel boxed in. They also wipe down quickly and work in spaces as narrow as 18 inches.
I installed my first set in a 5-foot-wide guest bathroom that had zero storage besides a shallow medicine cabinet. The room went from chaotic to calm in about two hours. Towels sat folded on one shelf. Small baskets corralled toiletries on another. The floor stayed clear, and cleaning took half the time because I wasn’t maneuvering around furniture legs.
The other reason I keep coming back to floating shelves is flexibility. You can mount one long shelf above the toilet, stack two or three vertically in a narrow corner, or run a short ledge beside the sink for daily essentials. Wood warms up a cold tile room. Painted MDF matches a modern aesthetic. You get to decide.
What You’ll Need
Materials
Table
| Item | Why You Need It | My Pick |
|---|---|---|
| Solid wood or MDF shelf boards (1–2 pieces, 8–10 inches deep) | The visible surface you actually store things on | Pine or poplar for painting; oak or walnut for staining |
| Floating shelf brackets (2 per shelf) | Hidden hardware that bears the weight | Heavy-duty steel blind brackets rated for 50+ lbs |
| Wall anchors (if missing studs) | Backup support for drywall-only mounting | Toggle bolts rated for at least 75 lbs |
| Wood screws (2.5 to 3 inches) | Attaches brackets to studs | Coarse-thread construction screws |
| Sandpaper (120 and 220 grit) | Smooths the wood before finishing | Standard multi-pack |
| Paint, stain, or sealant | Protects wood from bathroom humidity | Water-based polyurethane or satin enamel |
Tools
Table
| Tool | Purpose | Budget-Friendly Option |
|---|---|---|
| Stud finder | Locates wall studs behind drywall | [Check Current Price on Amazon] |
| Power drill | Drives screws and bores pilot holes | [Check Current Price on Amazon] |
| Level (24-inch) | Keeps your shelf straight | [Check Current Price on Amazon] |
| Pencil and tape measure | Marks accurate placement | Any hardware store basics |
| Circular saw or hand saw | Cuts shelf boards to length | [Check Current Price on Amazon] |
| Paintbrush or foam roller | Applies finish evenly | [Check Current Price on Amazon] |
You probably own a few of these already. If you don’t have a stud finder, I’ve had decent luck tapping the wall and listening for the dull thud of a stud versus the hollow sound of open drywall. But a $20 stud finder removes the guesswork, and you’ll use it for every future project.
Planning Your Shelf Layout
Measure your wall space before you buy a single board. I write down three numbers: total wall width, the height I want the shelf, and the depth I can afford before the shelf bumps into a door swing or a towel bar.
Above the toilet is the most common spot. Leave at least 18 inches between the toilet tank and the bottom of the shelf. Any lower and you’ll knock your head leaning forward. Any higher and you’ll need a step stool to reach your stuff.
Beside the vanity works if you have a gap between the sink cabinet and a wall. A 12-inch shelf at counter height gives you a spot for a toothbrush holder, a small plant, or a candle.
In a narrow corner, stack two shelves with 14 to 16 inches of vertical space between them. This creates a mini storage tower without the bulk of a cabinet.
Always locate your studs before you finalize placement. Standard stud spacing is 16 inches on center in most homes. If your ideal shelf length doesn’t line up with two studs, you have two options: shorten the shelf, or use heavy-duty toggle anchors. I prefer hitting at least one stud and supplementing with a toggle bolt on the open side. It gives me peace of mind.
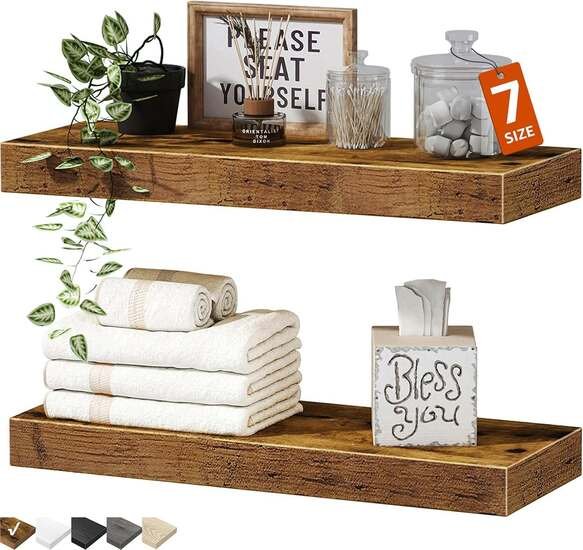
Step-by-Step Installation
Find Your Studs
Run your stud finder horizontally across the wall where you want the shelf. Mark the outer edges of each stud with a pencil, then find the center by measuring. I mark a light X at each center point. Double-check by driving a small finishing nail through the drywall. If it bites into wood, you’re good. If it punches through to empty space, adjust.
Mark and Drill
Hold your shelf bracket against the wall at the desired height. Use your level to draw a light pencil line along the top edge of where the shelf will sit. This line is your reference. Mark your screw holes on the stud centers.
Drill pilot holes slightly smaller than your screw diameter. If you’re using toggle bolts, drill the exact diameter the package specifies. I’ve stripped too many holes by getting lazy here. A clean pilot hole prevents cracked drywall and stripped screw heads.
Install the Brackets
Drive your screws through the bracket flange and into the studs. Don’t overtighten. You want the bracket snug against the drywall, but burying the screw too deep weakens the grip. If you’re using toggles, insert the toggle through the drywall first, then tighten until the bracket sits flat.
Give each bracket a firm tug. It shouldn’t wiggle at all. If it moves, back the screw out and check whether you hit the stud center correctly.
Mount the Shelves
Slide your shelf board over the bracket rods. Most floating shelf brackets have two metal prongs that insert into holes drilled in the back of the shelf board. If you bought a pre-drilled shelf, this part takes ten seconds. If you cut your own board, lay the bracket on the back of the shelf and mark where the prongs hit. Drill holes to the exact depth specified by the bracket manufacturer.
Tap the shelf onto the bracket with the heel of your hand. It should sit flush against the wall with no visible gap. Step back and check with your level. If the bubble drifts, tap the high side down or shim the bracket slightly.
Styling Your New Bathroom Shelves
A bare shelf looks like a missed opportunity. I follow a simple rule: keep daily essentials on the bottom shelf and display pieces up top.
Bottom shelf: Woven baskets hide extra toilet paper, hair products, and cleaning supplies. I like seagrass or water hyacinth because they handle humidity better than raw cotton. [Check Current Price on Amazon]
Middle shelf: Stack two or three fluffy hand towels. Roll them instead of folding them flat. It takes up less depth and looks more intentional. Add a small ceramic tray for soap or a candle.
Top shelf: This is your breathing room. A small pothos or snake plant in a ceramic pot adds life. A framed print or a small clock fills width without adding clutter.
Keep the color palette tight. If your bathroom has white tile and chrome fixtures, stick to white, natural wood, and maybe one accent color like navy or sage. Too many competing colors make a small space feel smaller.
Common Mistakes to Avoid
Skipping the stud finder. I’ve tried the “knock and guess” method. It failed twice. One shelf ripped clean out of drywall after three weeks of holding shampoo bottles. Drywall anchors help, but studs are your insurance policy.
Overloading the shelf. Even heavy-duty brackets have limits. Check the weight rating printed on the package. A shelf packed with glass jars, thick books, and potted plants can easily hit 40 pounds. Spread the weight out, and keep the heaviest items directly over the brackets.
Ignoring humidity. Standard interior paint or raw wood swells and warps in a steamy bathroom. I learned this the hard way with a beautiful birch shelf that cupped after six months. Seal every surface, including the underside and the back edge, with at least two coats of water-based polyurethane.
Mounting too high or too low. Sit on your toilet. Stand at your sink. Reach for a towel. Your shelf should live where your hands naturally go. If you have to stretch or crouch every time, you’ll stop using it.
Maintenance and Care
Wipe your shelves down every week with a dry microfiber cloth. Dampness collects on horizontal surfaces, especially in bathrooms without exhaust fans. Every few months, check the bracket screws. Wood expands and contracts with seasonal humidity, and a screw that was tight in January might need a quarter turn by August.
If you stained or painted the shelves, expect to touch up the finish every two to three years. A quick sand and a fresh coat of sealant takes twenty minutes and keeps the wood looking sharp.
Key Takeaways
- A DIY floating shelf bathroom makeover costs roughly $50 to $100 and takes one afternoon.
- Always mount into wall studs when possible; supplement with toggle bolts only when necessary.
- Seal every surface of the shelf with water-based polyurethane to prevent warping in humid conditions.
- 8 to 10 inches is the ideal shelf depth for most residential bathrooms.
- Style with baskets, rolled towels, and one or two plants rather than cluttering every inch.
- Check bracket screws seasonally since humidity causes wood to expand and contract.
- Pre-drilled shelf boards save time, but custom-cut wood gives you exact dimensions.
- Keep heavy items centered over brackets and lighter decor near the ends.
Frequently Asked Questions
How much weight can a floating shelf hold in a bathroom?
Most heavy-duty blind brackets support 50 to 75 pounds when mounted into studs. If you use toggle bolts in drywall only, cut that rating in half. I treat 30 pounds as my practical limit for mixed mounting.
Can I install floating shelves on tile walls?
Yes, but you need a masonry drill bit and patience. Mark your hole, place masking tape over the spot to keep the bit from wandering, and drill slowly with water as a lubricant. Use wall anchors designed for tile and backer board.
What wood is best for bathroom floating shelves?
Teak, cedar, and white oak resist moisture naturally. Pine and poplar work fine if you seal them properly. MDF is the cheapest option but swells instantly if the paint seal cracks.
How deep should bathroom floating shelves be?
8 to 10 inches is the sweet spot. Anything deeper blocks movement in tight spaces. Anything shallower won’t hold folded towels or standard baskets.
Do I need a contractor for this project?
Not for a standard installation. If you can operate a drill and a saw, you can handle this. The only time I’d call a pro is if you need electrical work moved or if you’re mounting into plaster and lath in a pre-1950s home.
How do I keep floating shelves from sagging?
Buy brackets rated for double your expected load. Mount into studs whenever possible. And avoid particle board. It sags under its own weight over time.




Leave a Reply